 von
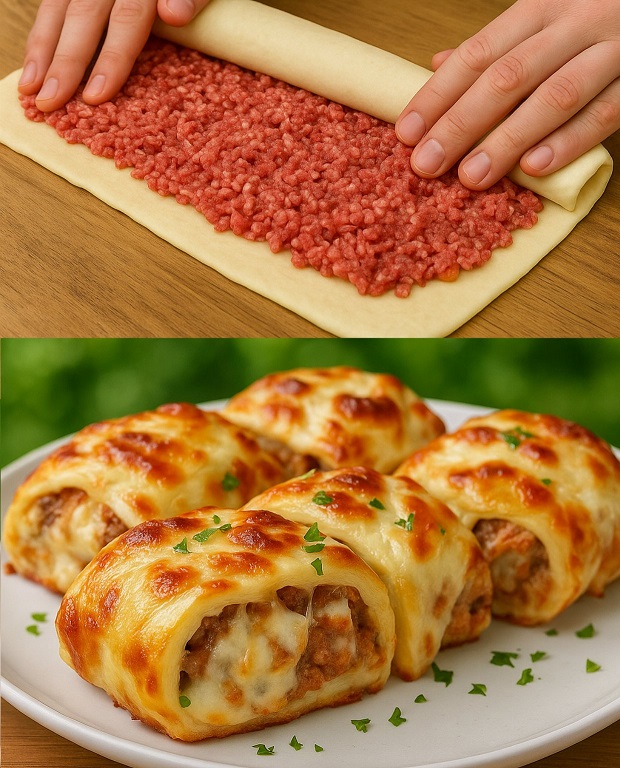
Savory Puff Pastry with Minced Meat and Cheese is a warm, flaky, and flavorful dish that brings comfort and gourmet elegance to any meal. With its buttery layers and savory filling, this dish is not only a showstopper for guests, but also an incredibly satisfying bite-sized treat for casual meals. Let’s dive into a comprehensive, 3000+ word guide that breaks down every step, trick, and variation to perfect this delightful recipe in your home kitchen.
Why This Recipe Works
From the golden crisp of the pastry to the juicy, well-seasoned minced meat paired with melted cheese, this recipe delivers on all fronts:
- Comforting Flavor: The combination of beef (or other minced meat) and cheese is universally loved.
- Flaky Texture: Puff pastry delivers that irresistible crunch and buttery layers.
- Easy to Assemble: Store-bought pastry sheets make it beginner-friendly.
- Perfect For Any Occasion: Great for parties, brunches, family dinners, or quick snacks.
- Freezer Friendly: These can be frozen before baking for make-ahead convenience.
Ingredients You Will Need
For the Filling:
- 1 lb (450g) ground beef or ground turkey
- 1 cup shredded cheese (cheddar, mozzarella, or a mix)
- 1 small onion, finely chopped
- 2 garlic cloves, minced
- 1/2 tsp salt
- 1/2 tsp ground black pepper
- 1/2 tsp paprika
- 1/4 tsp chili flakes (optional)
- 2 tbsp chopped parsley
For the Pastry:
- 1 package of puff pastry sheets (thawed if frozen)
- 1 egg (beaten, for egg wash)
- A touch of flour for rolling
How to Make Savory Puff Pastry with Minced Meat and Cheese
Step 1: Prepare the Filling
In a skillet over medium heat, add a splash of oil and sauté the onion until translucent (about 5 minutes). Add minced garlic and cook another minute.Add ground meat, breaking it apart with a spatula. Cook until browned and cooked through (about 7-10 minutes). Season with salt, pepper, paprika, and optional chili flakes.Remove from heat and mix in shredded cheese and fresh parsley. Let the filling cool to room temperature before using.
Step 2: Roll Out the Pastry
Preheat oven to 375°F (190°C). Line a baking tray with parchment paper.Unfold the puff pastry on a lightly floured surface. Roll gently to even out the thickness. Cut into squares (about 4×4 inches).
Step 3: Assemble the Pastries
Place a heaping tablespoon of filling in the center of each square.Fold over to form a triangle (or rectangle for larger versions), and press edges to seal. Use a fork to crimp the edges tightly.Transfer to the baking tray. Brush tops with beaten egg.
Step 4: Bake to Perfection
Bake in the preheated oven for 20-25 minutes, or until the pastries are golden brown and puffed.Let cool slightly before serving.
Tips for Best Results
- Use Cold Pastry: Work with cold puff pastry for best flakiness.
- Drain Grease: If your meat is very greasy, drain some fat before adding cheese.
- Don’t Overfill: Too much filling will prevent the pastry from sealing.
- Cool the Filling: Hot filling will melt the pastry before baking.
Make Ahead and Storage
- Refrigerator: Store leftovers in an airtight container up to 3 days.
- Freezer: Freeze unbaked pastries on a tray, then transfer to a freezer bag. Bake from frozen, adding 5-7 extra minutes.
Nutritional Info (Per Pastry, Approximate)
- Calories: 320
- Protein: 12g
- Carbs: 24g
- Fat: 21g
- Fiber: 1g
Flavor Variations
- Italian Style: Add a spoonful of marinara and sprinkle of oregano.
- Greek Twist: Use ground lamb, feta, and mint.
- Spicy Kick: Mix jalapeños and pepper jack into the filling.
- Vegetarian Option: Use mushrooms, spinach, and cheese.
Serving Suggestions
- Serve with a green salad and a drizzle of balsamic glaze.
- Pair with tomato soup for a comforting combo.
- Great as part of a brunch buffet.
- Perfect for lunchboxes or picnics.
Recommended Tools
- Baking sheet
- Parchment paper
- Pastry brush
- Sharp knife or pizza cutter
- Mixing bowls