 von
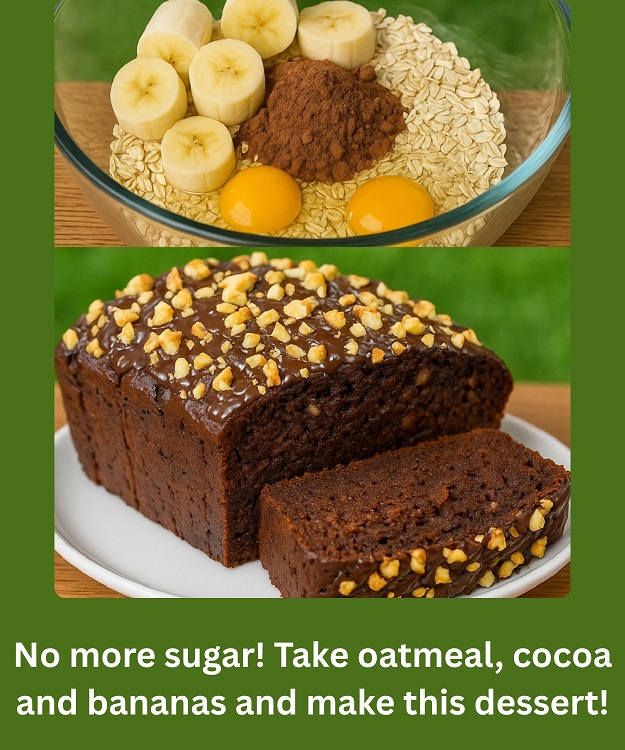
Okay, so let me tell y’all something about this Chocolate Banana Oatmeal Treat. It’s one of those recipes that just kinda happened, you know? Like, one day I was staring at those sad, overripe bananas on the counter—you know the ones, all speckled and soft, the kind your kids refuse to eat—and I was just like, „Okay, we either toss these or we do something with ‘em.„
And I’m gonna be honest here: I am not the kinda mom who lets good food go to waste. I mean, with the cost of groceries these days, y’all feel me, right? Every time I see a brown banana, I feel like I owe it to my budget to give it a second life.
So, yeah, I grabbed those bananas. And here’s the thing—my youngest, Jamie, she’s seven and she’s obsessed with chocolate. Like, if it’s not chocolate, she’s like, “Mom, why even bother?” (Tell me I’m not the only one with a kid like that, ha!) So I thought, you know what? Let’s try to make something chocolatey and healthy, like a little compromise between her sweet tooth and my whole “let’s not give the kids straight-up sugar all day” philosophy.
So, that’s how this Chocolate Banana Oatmeal Treat came to life. I wanted it to be something simple—because let’s be honest, I do not have the time (or patience) for fancy, fussy recipes with 20 ingredients I have to go to three different stores to find. And, of course, I wanted it to be something that wouldn’t make me feel guilty if I had it for breakfast… or as a midnight snack (which, let’s be real, happens more than I’d like to admit).
So let me break down what you need real quick:
Ingredients:
- 3 ripe bananas (the riper, the better—this is where the natural sweetness comes from!)
- 2 eggs
- 25 grams of unsweetened cocoa powder (or just grab what you have—no fancy stuff needed)
- 5 grams baking powder (this is optional, but I like to throw it in for a little fluff)
- Rolled oats – around a cup, maybe a bit more if the bananas are super mushy
- A pinch of salt, if you like
- Optional toppings: banana slices, nuts, or whatever your heart desires!
And that’s it, y’all. Like, seriously. Just a handful of things—no added sugar, no weird protein powders, no monk fruit sweetener or whatever the new thing is. Just real stuff you probably already have.
Now let me tell you how it goes down, step by step. And hey, don’t stress about making it perfect. If your kitchen looks like a tornado hit it (like mine usually does), it’s fine. If the kids are hollering in the background while you’re mashing those bananas, it’s fine. This is real life, not some fancy cooking show.
Step-by-Step Directions (the real mom version):
Step 1: Prep Your Pan
Turn that oven on to 350°F. While it’s heating up, line a small loaf pan or a muffin tin with parchment paper, or just grease it up good if you don’t feel like messing with the paper.
I usually use the loaf pan because I like slicing it up like banana bread, but muffins are super cute, too—especially if you wanna toss ‘em in lunchboxes.
Step 2: Mash and Mix
Grab a big bowl. Throw in those bananas and mash the heck outta them. I mean, get in there. I use a fork, but if you’re fancy and have a potato masher, go for it. Get it as smooth as you can—some lumps are fine, though. Ain’t nobody got time to puree bananas perfectly.
Crack in the eggs. Whisk it all together—this part’s kinda fun, and the kids can help if they’re not already glued to their screens. Then, stir in the cocoa powder and baking powder (if using), and dump in the oats. Stir it all up until it’s a big ol’ chocolatey mess.
It’s okay if the batter looks a little thick or runny—bananas aren’t an exact science. If it seems too wet, throw in a spoonful more oats. Too dry? Eh, add a splash of milk or water. No biggie.
Step 3: Bake and Decorate
Pour that delicious mess into your pan (or scoop it into muffin cups). If you’re feeling fancy, slice up another banana and stick the slices on top. Or sprinkle on some chopped nuts—almonds or walnuts are super good. Sometimes I even throw on a few dark chocolate chips because, well, chocolate.
Bake for 20–25 minutes. I usually check it at 20 with a toothpick—if it comes out clean, you’re good. If not, give it a few more minutes. Every oven’s a little different, you know?
Let it cool a bit before you dig in (if you can wait that long, ha!). It smells so good, the kids usually hover around the kitchen waiting for me to say “it’s ready!”